
Help Centre
<
Home
Magento 2 Installation Guide
Typically takes 2
minutes


You can install Salesfire to your Magento 2 site in just a few minutes.
There are two methods listed to help with installation but only one is required.
Method 1: Install via composer
- To install Salesfire via composer follow the steps here.
- When prompted to retrieve the extension’s composer name and version in the guide, enter the following commands:
composer require salesfire/magento2

php bin/magento setup:upgrade

php bin/magento setup:static-content:deploy
3. Now follow the How to setup section
How to setup
After installation, you will need to enter your Salesfire details.
- In Magento, navigate to your Salesfire settings through Stores then click on Configuration, head to Salesfire, and go to General.
- Mark Enable as Yes and ensure Use Website is checked.
- Find your Site ID in your Salesfire dashboard by navigating to Settings.
- Then populate using this Site ID and mark enabled as Yes.
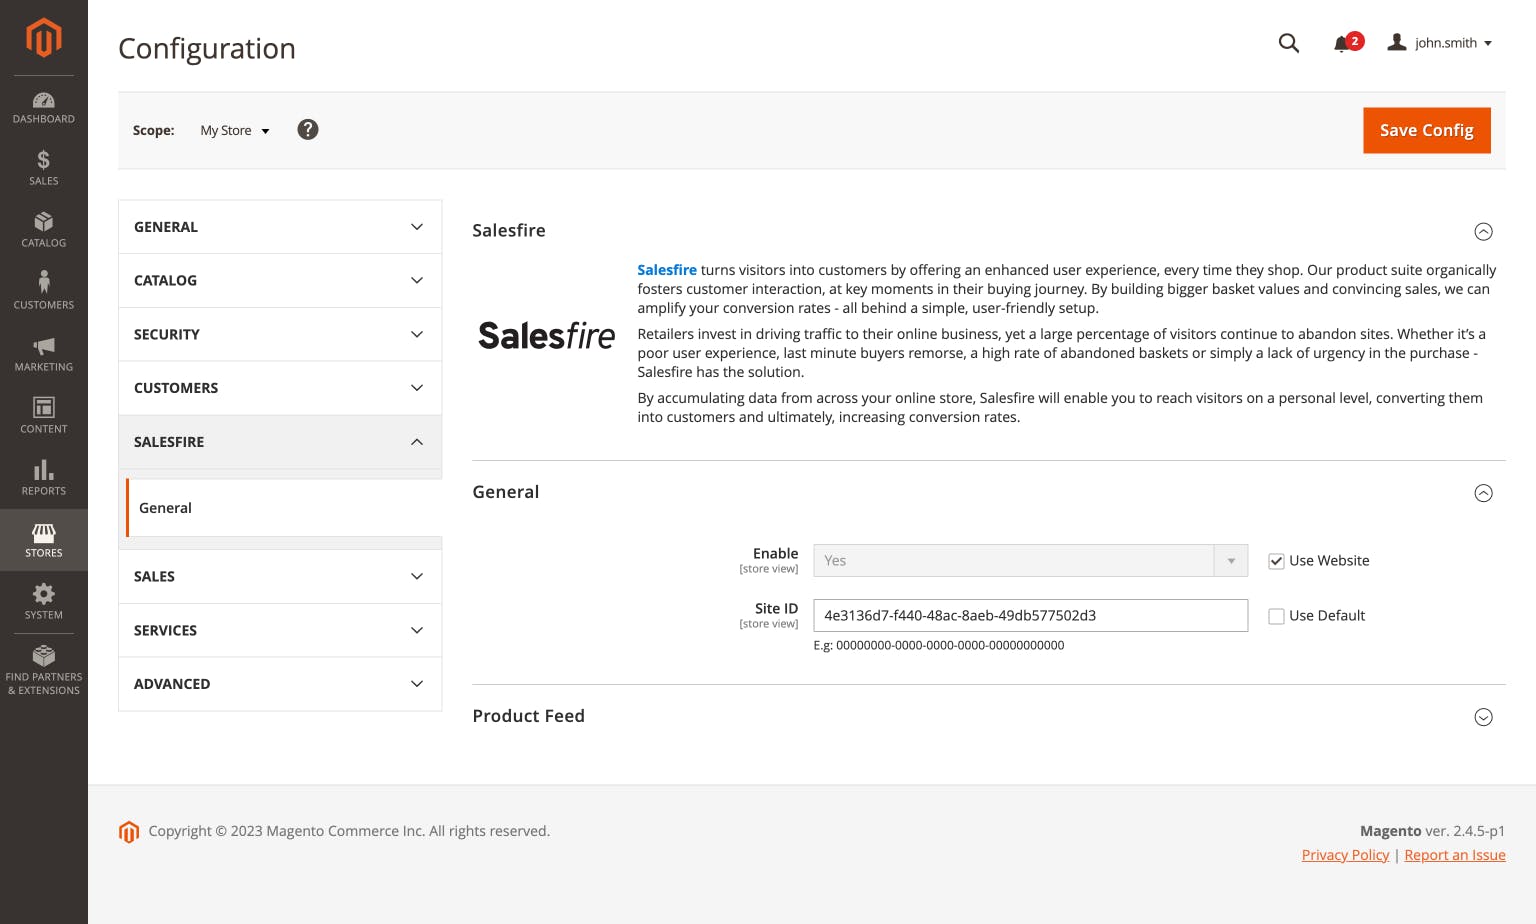
Click Save Config.
Installation is now complete.
Method 2: Manually install via composer
Manual installation should only be used on the rare occasion you are unable to complete installation via composer.
- Access your server via SSH.
- Create a folder that is not a Magento root directory called: Salesfire.
- Download the zip package here and upload to the Salesfire folder.
Add the following snippet to composer.json:
  {

        "repositories": [

            {

                "type": "artifact",

                "url": "path/to/root/directory/salesfire/"

            }

        ]

    }
Run composer command line
composer require salesfire/magento2

php bin/magento setup:upgrade

php bin/magento setup:static-content:deploy
Now follow the How to setup section to complete.